I LOVE this quote. Our home is decorated in Nativity and advent calendars for Christmas and this quote fits right in. And in all honesty the only hints of Santa are a few ornaments on the tree and my baking apron. This year has been SLAMMED with so much happening that the only thing I could do was print it off and put it in a frame. I do however have plans to cut this out in vinyl, put it on a board and hang it up in my home. I may even leave it up all year as it really is my favorite quote and every time I read it, it helps me put my life back into perspective.
Showing posts with label Paper Crafting. Show all posts
Friday, December 13, 2013
Thursday, December 5, 2013
Altered Recipe Tin
My friend Tanya made one of these for a co-worker of mine (before I knew her) years ago. I fell absolutely in love with it and BEGGED her to make me one too. I LOVE LOVE LOVE it. Seriously, probably one of my favorite things I've ever gotten. Every time I look at it a huge smile comes across my face. I've loaded it full of my favorite recipes (pre Pinterest) and it looks so cute on my counter. I especially love all the tiny details she put into it.
Each divider is unique, cute and ageless. (And yes we know Desserts is spelled wrong).
The top has a crackle finish, the ribbons are all color coordinating and there is even a charm hidden in there. Seriously, what is there NOT to love about this?!
I've made several recipe boxes based on this example. This works great as a card box too as it's the perfect size for most cards!
Items Needed:
LOTS of ribbon
Coordinating paper
Embellishments
Letters
Computer/Printer
Paint
Crafting tools - paper cutter, modpodge, scissors
Ink
Directions:
Use your imagination and design and create fun boxes filled with recipes, cards or even photos! The ideas are endless. If you can't find this kind of tin, then use another. Just remember to have fun!
Wednesday, September 4, 2013
Patriotic Canvas Picture
In a craft swap, I made my friend Angela this cute canvas print. I originally saw the print on Pinterest but it was only a lame picture, not the actual printout. It took me a few weeks to find the ACTUAL printout an when I did, I fell in love with it. I love the simplicity of it and hope she did too!
Items Needed:
8x10 Canvas
8x10 Canvas
Print out of desired picture.
Modpodge & sponge brush
Modpodge SPRAY - clear acrylic sealer matt finish
Cutting Board
Directions:
1. Print out desired picture. If you like the photo I have above it can be found HERE.
2. Cut photo to size of canvas.
3. Using a sponge brush, glue picture onto canvas. You may want to turn canvas over and press out all air bubbles that may attempt to stick around. You want ZERO air bubbles.
4. Once glue is dry, then using the Modpodge spray adhesive spray on MULTIPLE coats. Allow each coat to thoroughly dry before applying another coat. I have an inkjet printer. So my ink smears when I try to brush on modpodge glue. I learned that the spray on works amazingly well and does not make my ink run! I applied 5 thick coats.
Tuesday, September 3, 2013
Felt Board Pictures
My friend Alicia made my daughter some flannel board photos for a craft swap. They are so cute and she even used photos of our family in them. And the best part is that they are SUPER easy to make. Seriously when she told me how she did them, it was one of those "duh, why didn't I think of that" moments. These work great for story time, quite activities or even for Church as they'll stick to the back of the bench!
Items Needed:
Pictures - can be printed from computer or photos or magazine cut outs.
Flannel of any color
Clear vinyl table cloth
Sewing Machine
Scissors
Directions:
1. Cut out or print out any pictures you wish to use.
2. Lay picture onto flannel.
3. Lay clear vinyl table cloth on top of photo.
4. Sew around the edges adhering the vinyl table cloth to the flannel.
5. Cut out around shape of picture.
*Note: You can also precut the flannel and table cloth before sewing. The choice is up to you.
Toilet Paper Art
In a craft swap, my friend Tanys made this for me. Believe it or not, it's made out of TOILET PAPER ROLLS! I've seen a few of these floating around on Pinterest, but that was long after she had made and sent me this amazing creation!
Looking at it from a distance or even up close, you CANNOT tell it's out of toilet paper rolls. It looks so authentic. The only thing you need to really be warned about with them is that they are VERY FRAGILE! So if end up making these, then put it up on the wall or somewhere where little (or big) hands can hurt it.
I seriously can't tell you how much I love this and how many compliments we have gotten on ours!
If you are interested in making this, visit THIS blog for a tutorial. It's SUPER time consuming, but oh so worth it in the end!
Seating Place Markers
In one craft swap, I don't remember the theme, but I made one girl seating place makers for her entire family. This is something she does for each gathering and the ideas she comes up with are so creative and cute. She puts so much time and effort into each one that I wanted to help her out and make some for her to use the next time she gathered together with her family.
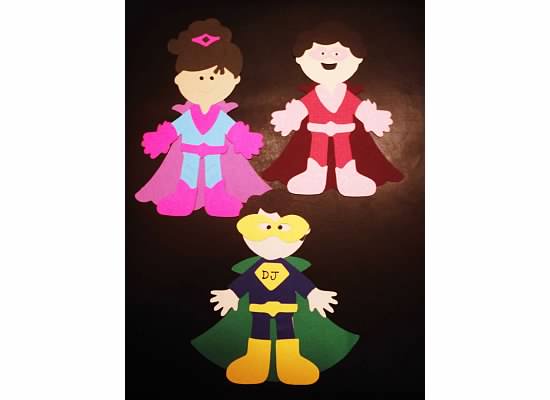
Using my Cricut I made these paper dolls of each member of her family. Each one was made to look as much like each person as possible and something that each of them could keep after the meal. They could use them as book marks, or magnets - what ever their hearts desired.
Overall, I think they turned out cute and were a great way to show each person how much she loved and cared for them.
Sunday, July 14, 2013
Story Starter Picture Cubes
My friend Angela sent this amazing craft to me during a swap. Ok, really it's for my daughter, but I can still play with it too! I have never heard of this and LOVE LOVE LOVE this idea.
You've never heard of it either? Well here is the concept: Roll each dice to figure out the Who, What Where and When - then YOU get to put all these together along with the Why and create a story!
You can buy story starter blocks but nothing as amazing as these! So why not whip up your own!
Items Needed:
(4) 1" blocks
Gel Pen
Notebook & Pen
Cute box to hold the blocks in (found at any craft store)
Cheat sheet (as pictured above)
Directions:
1. On each block draw the pictures as seen in the cheat sheet photo with the gel block.
2. Decorate your box with fun colorful pictures
3. Decorate your notebook if not already decorated.
4. Print out or make a cheat sheet
5. Assemble all and include a cute note.
Sticks Card Game - A Rummy Card Game with a Twist
My friend Jenine made this game for me in a swap. I had never heard of it and found it to be a fun game and great gift!
This game would take some time to make yourself but would be well worth it.
Items Needed:
4 decks of face cards
42 tongue depressor sticks
Fabric bag or fabric to make your own (make sure you cannot see through it)
1 pen or marker
Directions which can be printed HERE
2 different colors of scrapbook paper
Modpodge
Computer & Printer
Scissors
Directions:
1. Cover one side of each tongue depressor with one color of scrapbook paper - We'll say Brown. Modpodge down.
2. Cover the other side of the tongue depressor with scrapbook paper - We'll say Tan. Modpodge down.
3. Attach stick combinations to brown side of each tongue depressor. Modpodge down.
4. Cover each side of tongue depressor with an additional layer of modpodge.
5. Sew bag if you did not purchase one already.
6. Assemble all items in bag (include directions)
Christmas Countdown Muffin Tin Calendar
I started this craft a few years ago and finally just finished it. I think it turned out amazing.
Have you heard of muffin tin calendars? No? Then Jump on board and make one for yourself.
Items Needed:
(1) Mini 24 count muffin tin
Scrapbook Paper
Embellishments
Vinyl lettering (purchased or made yourself)
Mini Magnets or a magnetic roll
Number stickers
Hole Punch
Glue Dots / Zots
Glue of your choice
Directions:
1. Cut (24) 2" squares from solid card stock
2. Cut (24) 1 3/4" squares from festive card stock
3. Attach the festive card stock to the solid card stock
4. Add embellishments to each square using stickers, paper, ribbon, etc.
5. Add number stickers to each square.
6. Using mini magnets that you purchased attach four to each square (one on each corner).
If you did not buy any, then you get to make your own (like me)! Roll out your magnetic roll and using a single hole punch, punch out tiny magnets. This will make the perfect size magnet. Now GLUE your magnet to the paper. The adhesive that comes with the magnet is not strong enough.
7. Using pre-purchased vinyl or a cricut or silhouette attach the words Christmas Countdown to your muffin tin. Mine were 3/4" tall as that is what fit best on my muffin tin.
8. Now attach the squares to your muffin tin.
9. When it comes time to use it, hide a note or treat in each hole for your children/spouse/friends to find. Open one a day until Christmas!
Saturday, July 13, 2013
Button Wreath
I love button art. I love how subtle it is and how elegant it can be. For a Christmas themed swap I made my girls button wreath. Each one was slightly different but overall the same basic idea.
Items Needed:
10" Canvas or 10" wooden board
Scrapbook Paper
Buttons
Adhesive or Glue of choice
Ribbon
Modpodge
Glue Dots / Zots
Directions:
1. Cut scrapbook paper to fit canvas/board. I chose to cover the edges of my board with paper as well.
2. Modpodge paper to canvas/board and allow to dry.
3. Using 3 different sizes of buttons, begin with a center circle. Mine were 16 small buttons to create my center. Glue them in a circle, center to your canvas/board.
4. Once your inner circle is glued down, begin with the next size of button and go around the first button ring, gluing down all your buttons.
5. Once you have two rows of buttons down, using your largest buttons, glue down your third row.
6. With your ribbon, tie a bow to your preferred size.
7. Using Glue Dots/Zots attach bow to top button. (I originally tried to glue the bow on but that did not work.)
Clipboards & Clips
For a home office swap, I made my girls each a decorated clipboard and fun clips. Paper clips are so boring so why not use a cute clip to hold your papers together?
Items Needed:
Clipboard (any style wooden or plastic)
Scrapbook Paper
Modpodge
Ribbon
Embellishments
Fun Clips found at dollar store
Glue Dots / Zots
Directions for Clipboard:
1. Cut scrapbook paper to fit clipboard up to clip.
2. Modpodge the paper to the clipboard and let dry.
3. Modpodge the top of the scrapbook paper and let it dry.
4. Add embellishments to paper - words, ribbon, anything.
5. Add various ribbons to the clip part of the clipboard.
Directions for Clips:
1. Choose what items you want to decorate your clips with - buttons, flowers, ribbons etc. Anything will work.
2. Attach items to clips using Glue Dots or your preferred method.
3. Tie with a double knot ribbon to clips.
Patriotic Mirror
In a patriotic swap, I received this amazing mirror. The idea is so clever and so easy and it adds the perfect touch to my home!
Items Needed:
(1) Ikea Malma Mirror (or any wooden mirror)
Several sheets of patriotic themed scrapbook paper
Wood Stain & Brush
Scissors / paper cutter
Modpodge
Directions:
1. Stain your wooden mirror in the color of your choice.
2. Cut out snippets of scrapbook paper as seen above in squares or rectangles.
3. Modpodge scrapbook paper squares & rectangles to your mirror spacing them as you see fit.
3. Once dry, modpodge over the top of paper as well.
4. Once the modpodge is dry, lightly stain edges of wood again for distressed accents.
Sunday, June 23, 2013
Father's Day Banner
My friend Tanys made this for me for Father's Day in a swap. It's individual ties that she cut using her Silhouette with the words happy father's day! written on it. We are leaving ours up all month long to thoroughly enjoy it and will pull it out every single year to use again and again.
Items Needed:
Silhouette (or a stencil)
Ribbon
Ink
Glue or tape of choice
Directions:
1. Cut out (16) 8" ties using a solid card stock paper. Measurement is from top of tie to tip of tie.
2. Cut out (16) tie knots using fun scrapbook paper of your choice. (Technically it's a double tie knot as it's folded over the ribbon)
3. Cut out (16) tie tail sections using scrapbook paper of your choice.
Note: The solid card stock ties were one piece, but the patterned card stock paper ties were cut into two sections. The knot of the tie (which wraps around the ribbon) and the tail of the tie.
4. Ink the edges of all the ties with a complimentary color. She used brown. This adds a that extra touch that softens the ties and makes them pop.
5. Glue the knot and tail onto solid card stock paper making sure to wrap knot around ribbon before gluing/taping down. Remember to leave a space between words.
6. Cut out the letters happy father's day!
7. Attach them to the ties as shown above using glue or tape.
Wooden Block Picture
So this concept can be used for any photo. I however LOVE LOVE LOVE this photo of Christ's hand making the sign of I love you and showing his nail print. I think the message is so simple and so powerful that I can't help but continue to make these for everyone I know. The best part is that they work for just about any holiday. Christmas, Easter, Valentines etc. I've made them in two versions. The black with red ribbon and the gray with gray/silver ribbon.
Items Needed:
2x8" board
5x7 Photo of choice
Sand Paper
Paint color of choice
Wired ribbon of choice
Glue Dots or Zots
Directions:
1. Cut 2x8" board into 9" length pieces.
2. Sand board edges as they will be rough. Also sand out any rough spots in the wood.
3. Paint the entire block using your paint color choice.
4. Once dry, if you choose (see left block) sand edges to give it a distressed look. If you do this, ensure that you wipe the block very well before attaching photo.
5. Using 5x7 photo of choice, put glue dots or Zots on the back along the edges of the photo and attach to wooden block. If you want to use the same photo I did, then order it from the actual artist (Don't Steal!). It can be ordered from Darin Ashby and will take a few days to arrive.
6. Attach wired ribbon to block to add an extra element to photo.
Chipboard Album
In a spring craft swap I made my friend Heather this cute flower chipboard album. Michaels had them on clearance for $0.49 EACH! So I nabbed a few thinking one day I'll use it. And sure enough, I did! It was CHEAP, simple and a fun way to incorporate her family photos into the album. I also used one of her favorite poems about being a mother. The last picture, which is missing, is a family photo shot from behind (as if they are walking away from the camera). I thought it was the perfect photo for "The End" of the album.
Subscribe to:
Posts (Atom)