Showing posts with label Buttons. Show all posts

Thursday, December 5, 2013

Altered Recipe Tin

My friend Tanya made one of these for a co-worker of mine (before I knew her) years ago.  I fell absolutely in love with it and BEGGED her to make me one too.  I LOVE LOVE LOVE it.  Seriously, probably one of my favorite things I've ever gotten.  Every time I look at it a huge smile comes across my face.  I've loaded it full of my favorite recipes (pre Pinterest) and it looks so cute on my counter.  I especially love all the tiny details she put into it.  

Each divider is unique, cute and ageless.  (And yes we know Desserts is spelled wrong).
The top has a crackle finish, the ribbons are all color coordinating and there is even a charm hidden in there.  Seriously, what is there NOT to love about this?!

I've made several recipe boxes based on this example.  This works great as a card box too as it's the perfect size for most cards!


Items Needed:
LOTS of ribbon
Coordinating paper
Embellishments
Letters
Computer/Printer
Paint
Crafting tools - paper cutter, modpodge, scissors
Ink

Directions:
Use your imagination and design and create fun boxes filled with recipes, cards or even photos!  The ideas are endless.  If you can't find this kind of tin, then use another.  Just remember to have fun!

Wednesday, September 4, 2013

Wedding Dresses Turned Blessing Outfits

The idea isn't something new.  Turning your wedding dress into a blessing outfit for your child.  But I remember that even on my wedding day, I knew that one day, the very dress I wore would be one that my own children would wear.  After telling my mom my idea, she happily gave me her wedding dress too.  

So when I was pregnant with my daughter (6  years later) I began to take apart mine and my mothers wedding dresses.  I then asked my Mother In Law if she would sew the dress and make a bonnet to go with the dresses so that I would have a little something from all three of us included in this special dress.

The dress itself is made from my wedding dress.  The lace and buttons are from my mothers wedding dress (the lace had begun to turn cream over the years but was originally white)  My MIL who is an amazing crocheter/knitter made the bonnet.  I have never seen my dress look so amazing.  Unfortunately, though followed to a T, the dress was HUGE on my daughter on her blessing day.  I have later discovered this to be a blessing.  She was able to fit into and wear this dress until she turned 3.  It's been well worn and well washed and I hope one day she will want to pass it along to her daughter, adding her own embellishments to it.

When my son was blessed my MIL also made him an outfit.  The vest is from the lining of my wedding dress, the pants from the skirt of my dress and the bow tie and buttons from my mothers wedding dress.  PERFECT and sooo handsome!
 
Once my daughter turns 8 and is baptized (if she chooses) then we'll make her another white dress out of mine and my mothers dresses again.  Same goes for all my children.  There is more than enough fabric and hopefully she'll love this idea as much as I do.

And then hopefully there will be little scraps of fabric leftover that I'll be able to make each of them a hanky or purse or something small that they can cherish on their own wedding day.  This way they'll each have a little piece of us with them and know how much we love them each day. 

Like I said, the idea has been around for ages.  Heck, I had it 10 years ago.  But if you've not thought of what you are going to do with your wedding dress, this might be something you too consider.


Tuesday, September 3, 2013

Reindeer Ornaments

My friend Tanys made me a super cute Reindeer ornament in an ornament swap.  Seriously, where does she come up with these amazing ideas?!  

I cannot give you exact directions on how to recreate them.  However I can tell you that she used  regular round ornament.  She then used a type of clay for the ears and feet and either clay covered in glitter or a glitter button nose.  She then painted the entire thing in brown, added the cute wire antlers and hand painted the details.

This is one of my FAVORITE ornaments on my tree every year.  It's adorable, and one of the most crafty and cute things on my tree!   


Reversible Cup Cozy

I don't drink coffee, but do enjoy a nice cup of hot chocolate every once in a while.  So when it came time to do a 'sewing' swap, I decided to whip up a few of these for my crafting buddies.  

They hare reversible with a button latch and once you get the idea, are pretty easy to make.  I recommend making a bunch of them in a huge batch and then holding onto them as they make great gifts and stocking stuffers.  Just imagine one of these around an empty Starbucks cup with a gift card inside!  Simple, cute and something everyone can use!


Items Needed:
1.  (2) different fabrics (if you want them reversible).
2. A sewing machine!
3.  (2) buttons (one for each side)
4.  An elastic hair band
5.  Felt (inside 'batting')
6.  Scissors
7.  Thread
8.  Iron


Directions:
I did not whip up this pattern all by myself.  I actually followed a tutorial I found and tweaked it to my tastes.  The tutorial can be found HERE as credit should go to those who actually put the time and effort into making such a tutorial.

As you'll note, instead of batting, I used felt.  I found that it held it's shape better than ordinary batting and absorbed the heat!  I also added a button to each side to make it reversible.


Sunday, July 14, 2013

Christmas Countdown Muffin Tin Calendar

I started this craft a few years ago and finally just finished it.  I think it turned out amazing.
Have you heard of muffin tin calendars?  No?  Then Jump on board and make one for yourself.


Items Needed:
(1) Mini 24 count muffin tin
Scrapbook Paper
Embellishments
Vinyl lettering (purchased or made yourself)
Mini Magnets or a magnetic roll
Number stickers
Hole Punch
Glue Dots / Zots
Glue of your choice

Directions:
1.  Cut (24) 2" squares from solid card stock

2.  Cut (24) 1 3/4" squares from festive card stock 

3.  Attach the festive card stock to the solid card stock

4.  Add embellishments to each square using stickers, paper, ribbon, etc.

5.  Add number stickers to each square.

6.  Using mini magnets that you purchased attach four to each square (one on each corner).  
If you did not buy any, then you get to make your own (like me)!  Roll out your magnetic roll and using a single hole punch, punch out tiny magnets.  This will make the perfect size magnet.  Now GLUE your magnet to the paper.  The adhesive that comes with the magnet is not strong enough.

7.  Using pre-purchased vinyl or a cricut or silhouette attach the words Christmas Countdown to your muffin tin.  Mine were 3/4" tall as that is what fit best on my muffin tin.

8.  Now attach the squares to your muffin tin.

9.  When it comes time to use it, hide a note or treat in each hole for your children/spouse/friends to find.  Open one a day until Christmas!

Button Snake

In a quiet activity swap I did a few years ago, I received this button snake.  I had never heard of a button snake before then and have found this little gem to be priceless.  It's SUPER easy to make and has really helped my daughter learn about buttons and kept her busy in church and long car rides.


Items Needed:
One large button
12" of ribbon
Varying colors of felt
Needle 
Thread

Directions:
1.  Cut out (12) 3" squares from your felt.  If 3 colors of felt, then you want to cut 4 of each color.

2.  Cut a slit in each felt square large enough for the button to pass through with the exception of one.  Leave one square untouched.

3.  With the untouched square, sew ribbon onto center as seen above.

4.  With the other side of ribbon, sew it onto the button.  

5.  "Button" each square of felt to your snake.  

Saturday, July 13, 2013

Button Wreath

I love button art.  I love how subtle it is and how elegant it can be.  For a Christmas themed swap I made my girls button wreath.  Each one was slightly different but overall the same basic idea.  


Items Needed:
10" Canvas or 10" wooden board
Scrapbook Paper
Buttons
Adhesive or Glue of choice
Ribbon
Modpodge
Glue Dots / Zots

Directions:
1.  Cut scrapbook paper to fit canvas/board.  I chose to cover the edges of my board with paper as well.

2.  Modpodge paper to canvas/board and allow to dry.

3.  Using 3 different sizes of buttons, begin with a center circle.  Mine were 16 small buttons to create my center.  Glue them in a circle, center to your canvas/board.

4.  Once your inner circle is glued down, begin with the next size of button and go around the first button ring, gluing down all your buttons.

5.  Once you have two rows of buttons down, using your largest buttons, glue down your third row.

6.  With your ribbon, tie a bow to your preferred size.  

7.  Using Glue Dots/Zots attach bow to top button.  (I originally tried to glue the bow on but that did not work.)

Clipboards & Clips

For a home office swap, I made my girls each a decorated clipboard and fun clips.  Paper clips are so boring so why not use a cute clip to hold your papers together?


Items Needed:
Clipboard (any style wooden or plastic)
Scrapbook Paper
Modpodge
Ribbon
Embellishments
Fun Clips found at dollar store
Glue Dots / Zots

Directions for Clipboard:
1.  Cut scrapbook paper to fit clipboard up to clip.

2.  Modpodge the paper to the clipboard and let dry.

3.  Modpodge the top of the scrapbook paper and let it dry.

4.  Add embellishments to paper - words, ribbon, anything.

5.  Add various ribbons to the clip part of the clipboard.

Directions for Clips:
1.  Choose what items you want to decorate your clips with - buttons, flowers, ribbons etc.  Anything will work.

2.  Attach items to clips using Glue Dots or your preferred method.

3.  Tie with a double knot ribbon to clips.  

Thursday, January 24, 2013

Button Hearts

I love button art.  I made these for some girls in a valentines swap.   


 Items Needed:
(1) 8x11 canvas
Computer & Printer
Paint & Paint brush
LOTS of buttons in varying sizes and shades
Ribbon
Modpodge or glue of your choice
Scissors

Directions:
1.  Using a printer print out a large heart

2.  Cut out heart

3.  Trace heart onto canvas

4.  Paint heart

5.  Using modpodge or glue of your choice, begin to glue buttons onto painted heart.  Start at one end and slowly work your way to the other.  

6.  After all the buttons have been attached, attach a ribbon bow.

7.  Attach a ribbon to the back of the canvas for hanging purposes.

Thursday, January 17, 2013

Owl "Banner"

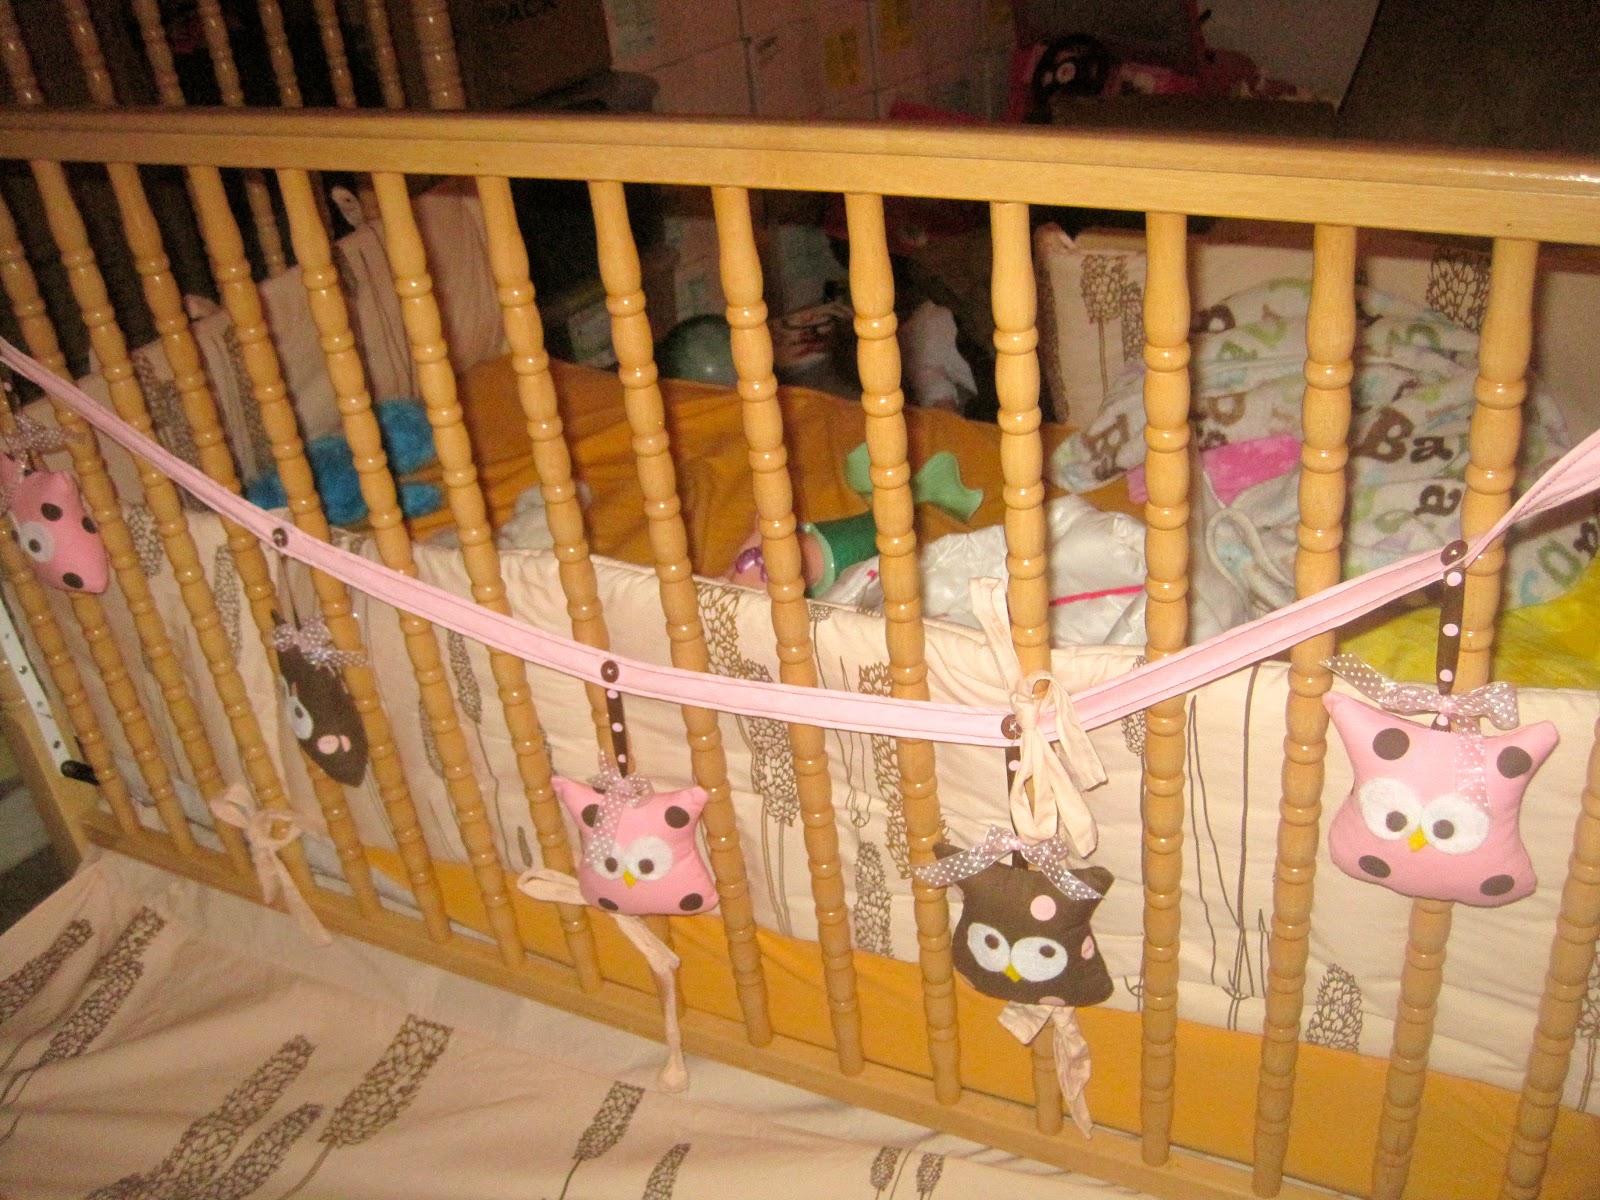
My friend Tanys sent me this just after I had my daughter.  Her room was done in brown and pink and in our old home we had these hung from the windows.  However in our new apartment, the only place it looked decent was on her crib.  

Unfortunately, we just converted her crib into a toddler bed and so these are now on the back of the crib until I can find a new place for them, so please excuse the pictures.

I love the detail in each of these.  There are 5 owls attached by a button to a fabric ribbon.  Each owl is stuffed and hung with cute ribbon.  I also love the extra touch of the sheer pink ribbon above the owl. 

They are then attached to each side of the crib with the same ribbon sewn to the end of the pink fabric ribbon (picture forgotten).  

Overall, my daughter LOVES these and at night/morning would play with them.  By far one of my favorite gifts!


Saturday, December 1, 2012

Journal Covers

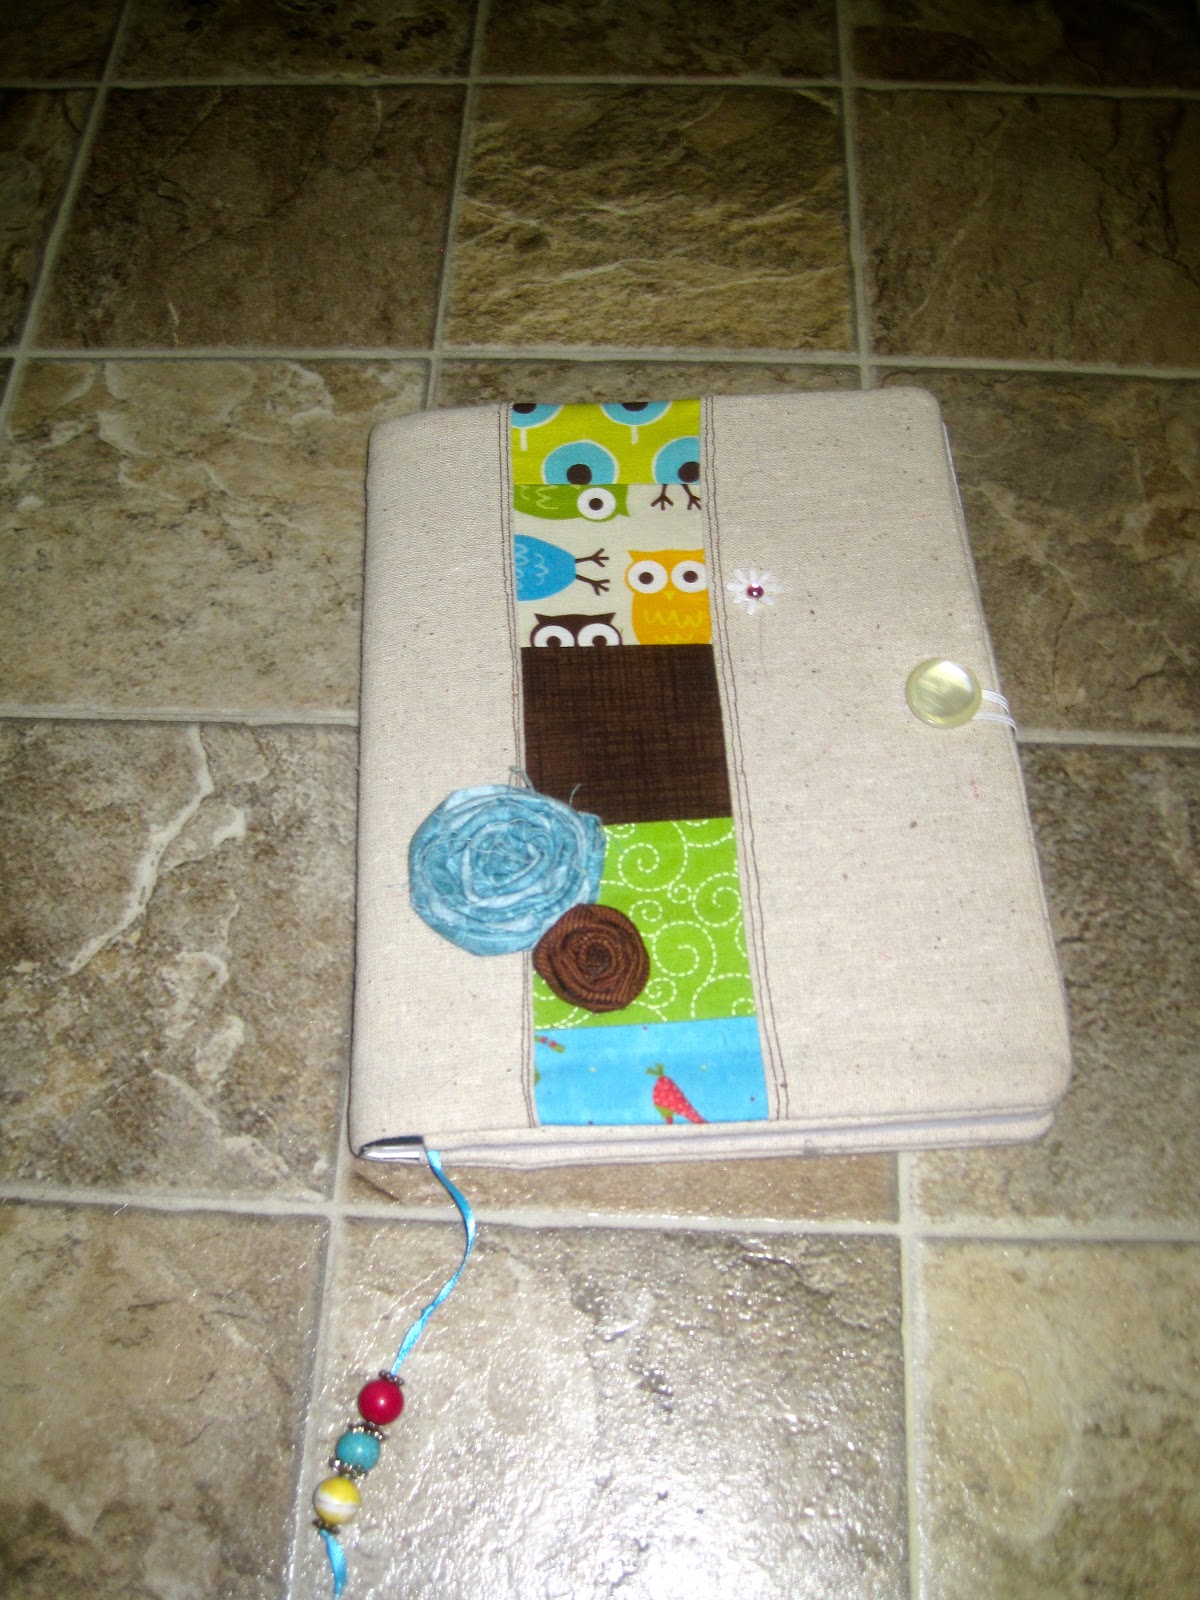
I don't have a tutorial for this, but wanted to show you how awesome this journal cover my friend Tanya made for me is.  

There are several aspects that I want to point out.  
First, I love how it's got a section of patchwork.  Adds so much character to it.
Second, I love the rosettes.  Rosettes make everything look better.
Third, I LOVE the bookmark.  What a great way to keep track of where you are AND I love how it hangs at the bottom with beads.
Fourth, I love how on the inside cover it has a pencil holder (owl fabric) AND another pocket to keep anything in like post it notes. Again, patch work.
Fifth, I love how on the back it has a pocket too!
Sixth - It's 100% removable. So when I'm finished with the book, I just whip it off and put it on a new book.  
Seventh, I love how it has a button fastener.  

Really this is such a great idea!  Much better than covering a note book with doodles or comics!


Friday, November 30, 2012

Gingerbread Ornaments

How cute an easy are these?  I made these for an Ornament exchange and thought they turned out perfect! 


Items Needed:
Brown Felt
White Ric Rack
Red Buttons
Thread
Batting (for stuffing)

Directions:
1.  Cut out gingerbread pattern.

2.  Sew Eyes, mouth and Ric Rack onto front piece of gingerbread man.

3.  Sew entire gingerbread man leaving small opening to stuff him.

4.  Once stuffed, finish sewing.

5.  Sew on buttons.

6.  Attach string to hang him from.

Directions and pattern found here.

Recipe Card Holders

A friend and I made these a few years back.  
They are great for having around in the kitchen or office to hold recipes or papers.


Items Needed:
Large Clothes Pins (found at any craft store)
Paper
Stickers
Embellishments
Ribbons
White Paint & brush
ModPodge

Directions:
1.  Paint the large clips the color of your choosing & let dry

2.  Cut paper to fit onto clothes pin

3.  Glue paper onto clothes pin - both sides

4.  Add embellishments

5. Add ribbons

Tuesday, October 30, 2012

Fabric Countdown Chain

As a child on the last day of November, we'd whip out the construction paper and glue and make ourselves and Christmas Countdown Chain.  You know the kind with 24 loops all strung together.  Each day of December you'd rip one off counting down the days until Christmas would arrive!  

I decided last year that I wanted to make one for myself.  I had looked all over the internet for a tutorial and didn't find one.  I did however find something similar on Etsy, but it wasn't the quality I was looking for - so alas I figured it out on my own and think I created a pretty great looking product!

I should probably point out here, I'm not a seamstress and though I took a basic class on sewing, I assure you I remember nothing.  I dabble in sewing and so if you follow my "directions" hopefully you wont cringe too much as I use incorrect jargon and make up stuff as we go along!

Items Needed:
1.  Fabric.  I use 4 different fabrics, but you can use as many as you'd like.  If you are using 4 fabrics, get 1/2  yard each.
2.  Innards.  I tried several things and believe it or not FELT was the best!  So 2 yards of felt.  (I think this is too much, but seeing as how I can't remember, we'll go with it).
3.  Scissors
4.  Needles (to hold fabric together)
5.  Sewing Machine
6.  Fabric Velcro (though I am toying with the idea of using magnets next time)
7.  Cute Buttons
8.  LOTS of thread.  :)  Because I make a LOT of mistakes!
9.  Iron.  The iron is your friend!

Directions:
1.  Cut your fabric.  You will need in total {48} strips of fabric and {24} strips of felt.  I cut mine to be 12 inches long by 3 inches wide.

2.  Once everything is cut, now it's time to assemble.  Lay your Felt down with Fabric A (green fabric in picture) face up on top of felt.  Lay Fabric B (brown fabric in picture) face down on top of green fabric.  Pin entire thing down.


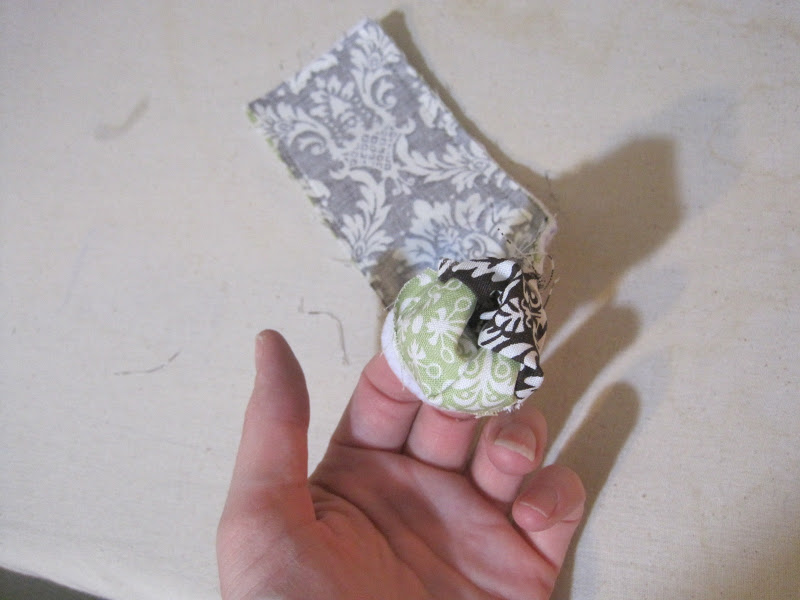
3.  Sew entire thing together starting on a long side.  Leave one of the short sides completely open (as you'll need to turn your fabric inside out later).  Remember me saying I'm not a technical or perfect seamstress?  Yep.  I put my needle as far to the right as possible and line my fabric up with the edge of my foot (see picture).  Then sew.

 4.  Now that all 3 sides are sewn, IRON.
 5.   Turn inside out so that felt remains in the center.
 
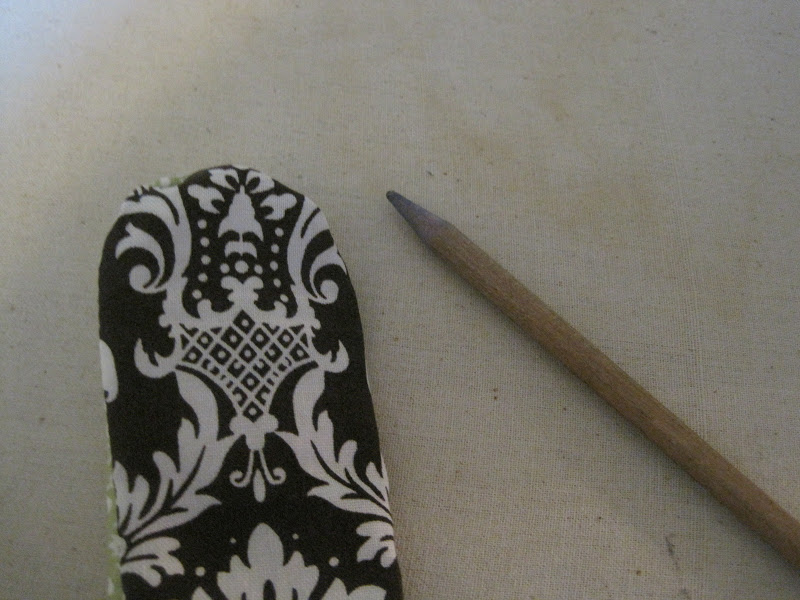
6.  Using a dull pencil (or similar object) poke the corners out.  (put pencil INTO fabric opening). 


7.  Iron.  Yep Iron it again and make sure to iron all your edges down.
 As you can see, ironing takes a poofy strip into a thin stiffer strip.  :)
 8.  On open end, turn edges inward and iron down.


 9.  Now we get to sew again!  This time turn needle as far to the LEFT as possible.  Following the edge of the fabric again (just as before) sew around the ENTIRE strip.  As you can see your edge is no longer exposed!
 10.  Now that all 24 of your strips are sewn down, it's time to add the Velcro.  Sew on piece of Velcro onto Fabric A (green fabric below).  Once sewn on, flip over and sew opposite side of Velcro onto fabric B (red fabric) but on the OPPOSITE end of the strip.  (see photo)

 If you did it correct, it should form a circle and Velcro together!
 11.  Now for the final touch!  A cute button!  This helps remind me color is the outer color as I like alternating colors on my chain!
 When it's done, you'll have 24 great looking fabric chains that can be used year after year!  This can also be used for birthdays, or any other Holiday.